
Hello friends! I want to thank everyone at Whim So Doodle for an incredible couple of days of classes and thanks to everyone who came out to classes too. The store is truly inspiring and they have everything you need for paper crafting, lettering, art supplies, gift items and even a quilting and sewing section. They also have Tim's Eclectic Elements fabric.
Today I'd like to share a few samples I made for the Tim Holtz Halloween releases. The releases have been awesome. If you missed the Facebook live with Tim be sure to check his blog for all the details. I hope you love the new products as much as I do!
SIZZIX ALTERATIONS
The new Sizzix Alterations release is full of classic, spooky and whimsical Halloween dies.
You can make cards, Mixed Media projects, treat bags and so much more.

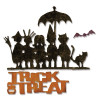
This card Bewitching Hour has to be my favorite card of the Sizzix release called Witchcraft. The die is a Thinlit Die and comes with the Witch holding her broom, the Cat and the Stars.

Color the background on Mixed Media Heavyweight cardstock using Distress Oxide Inks (Seedless Preserves, Twisted Citron, and Black Soot) then die cut the Stars out of the background. The Witch and Cat are die cut from black cardstock and then I add Distress Oxide Ink with an Ink Blending Tool over the Cat using the new Black Soot.

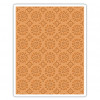
For the word Halloween I inked the Rosettes Texture Fade with Black Soot Archival Ink and embossed it on to the Green cardstock which created this fun debossed paper. Die cut the word Halloween form the Thin Halloween Words Thinlits die. The Thin Words die is perfect for cards! I also added one of the stars from the background for the center of the "O". I did some stitching around the card then assembled my card.
Idea-ology
Idea-ology is always a favorite for me! Love all the little treasures that are perfect for this Vignette box.

Paint the Finials with Black Soot Distress Paint and set aside to dry. Add Halloween Design Tape around the front edge of the large Vignette Box and wrap around to both sides. Cut a piece of the Halloween Paper Stash to fit the back of the box.

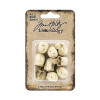
Choose a few pieces of Ephemera from the Halloween Pack and this will be the focal point of your piece . Elevate the Ephemera off the back of the box. I used a double stack of Game Pieces (about 1/2"thick). Tie Halloween Trimmings around the Finial at the top with a Halloween Shape Token.

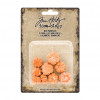
Cut pieces of Halloween Paper to fit behind the Halloween Transparent Tiles and adhere them about 1/4" off the back of the box. Add a thin layer of Glossy Accents to the Monocle. An Heirloom Rose is always a nice touch for the lapel.

Add Apothecary Vials with labels and hand made tags to tie around the neck of the bottles. Adhere the Mini Pumpkins and Skull with Collage Medium. You can also add a Halloween Word Band to the front of the box. Adhere Finials with Collage Medium and let dry.
Stampers Anonymous
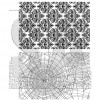
Stamps and Stencils are a staple for creating cards and great for Mixed Media projects as well. The new Halloween stamps and stencils are spooktacular I know you will LOVE them!

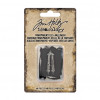
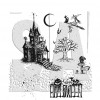
Start with a Black Cabinet Card and sand it a little with a Sanding Grip to grunge it up. Add a little stenciling using the new Distress Oxide Inks on an Ink Blending Tool and the Crossed Layering Stencil for a magical effect. Because theses Oxide Inks are a Pigment/Dye fusion the inks have enough opacity to show up on black. The background of the house was also done with Distress Oxide inks. Stamp the Haunted House with Black Soot Archival Ink, then take the waterbrush and lift color where the windows of the house are, now you can add color back with a Fossilized Amber Distress marker. Add color to the sides and roof of the house too.

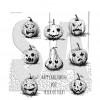
For the base of the card I stamped the Skulls background over a Kraft card. Small Talk Occasions has several Halloween and fall sayings that work great!

Alcohol Ink the Word Band, Numeral Token, and Roses. I also dyed some Linen Ribbon with Black Soot Distress Spray Stain. Adhere the layers and add the embellishments for this wicked haunted card.
I hope you find these inspiring!
Thanks for stopping by!
Richele
Check your local store or click the links below to head over to Simon Says Stamp.
 |  |  |  |
 |  |  |  |
 |  |  |  |